




Atlas.md gives you two ways to view a patient’s appointments. The chart view keeps appointments alongside the rest of the patient’s history, while Appointments Overview pulls their schedule into a dedicated list organized by appointment date.
Viewing Appointments in the Chart
Open the patient’s chart and click the calendar icon in the sidebar. This shows their past and future appointments as part of the wider chart timeline.
Hover over an appointment to reveal a few additional tools:
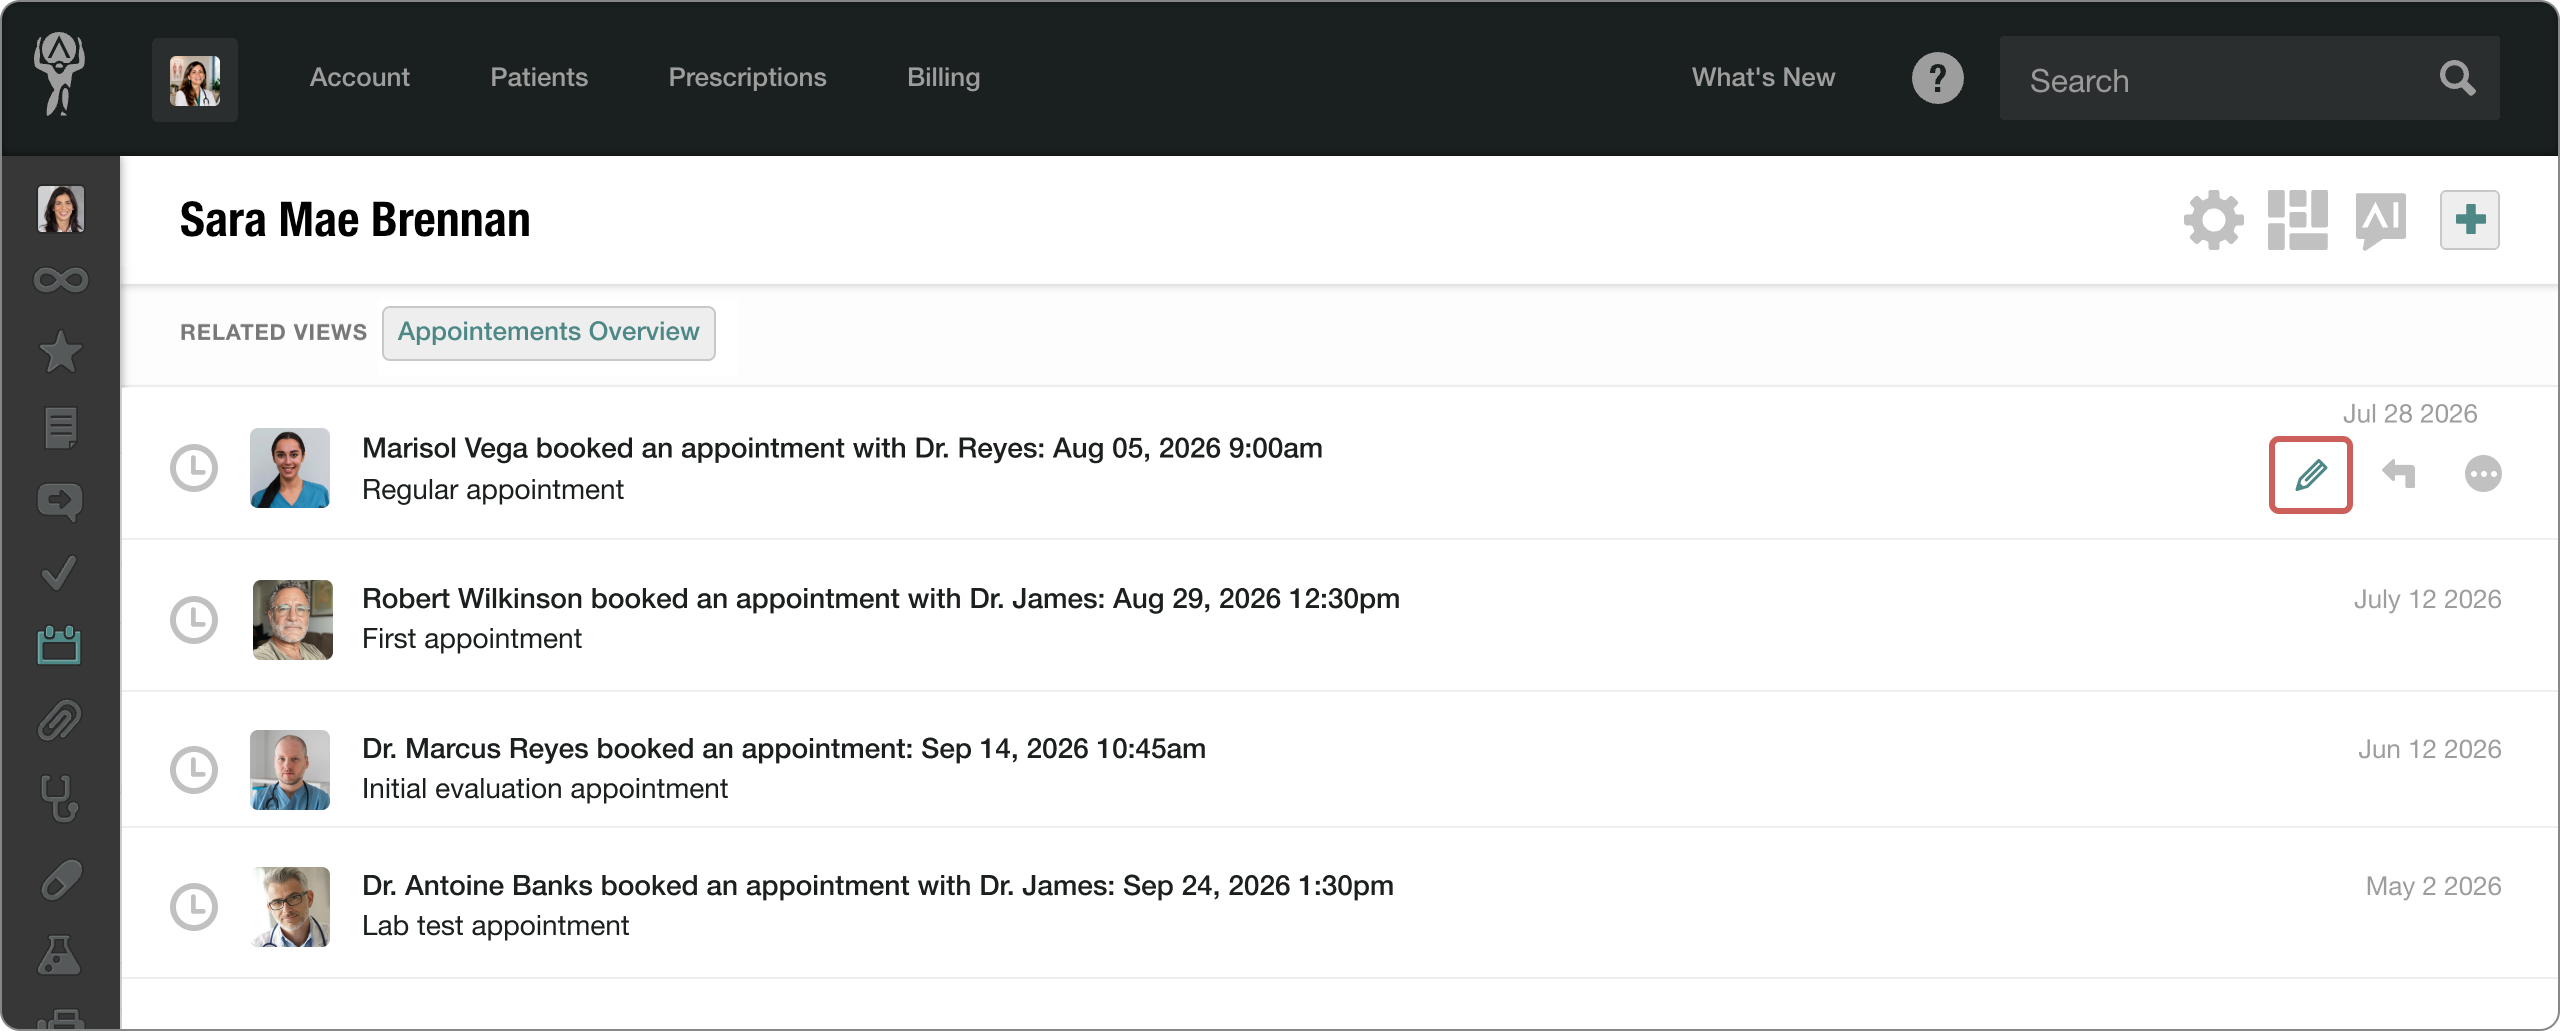
- Add a note using the reply arrow.
- Edit the appointment using the pencil icon.
- Print the appointment details using the printer icon. The printout will also include the patient’s demographics.
- Delete the appointment using the trash icon.
Getting a Clearer View With Appointments Overview
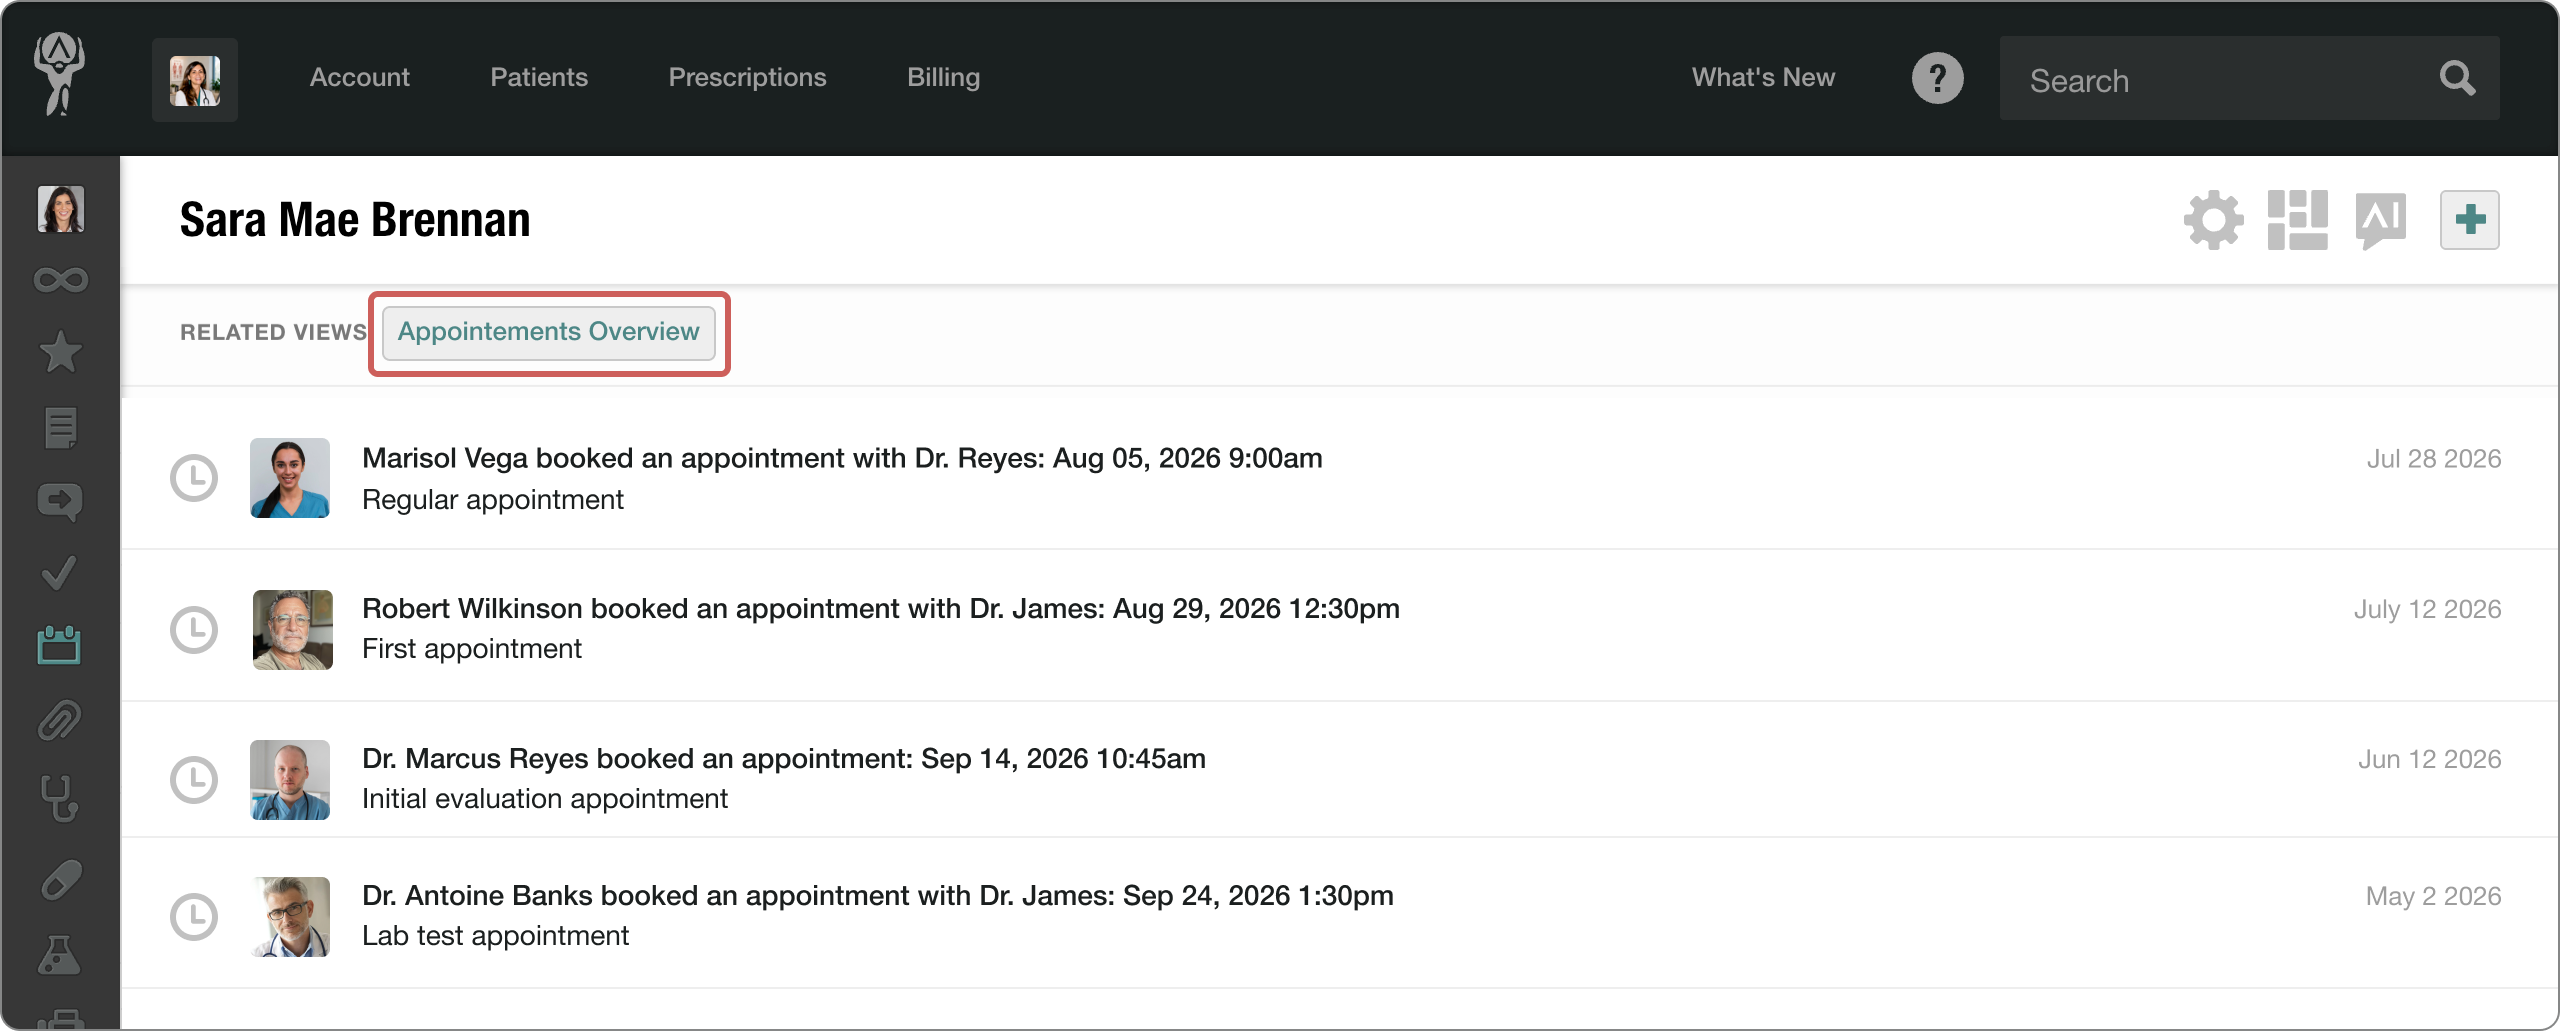
When you want to focus on the patient’s schedule without the rest of their chart activity, open Appointments Overview.
- From the patient’s appointment view, find the Related views row and select Appointments Overview.
Atlas.md organizes the patient’s appointments by their scheduled date, with the next visit at the top.
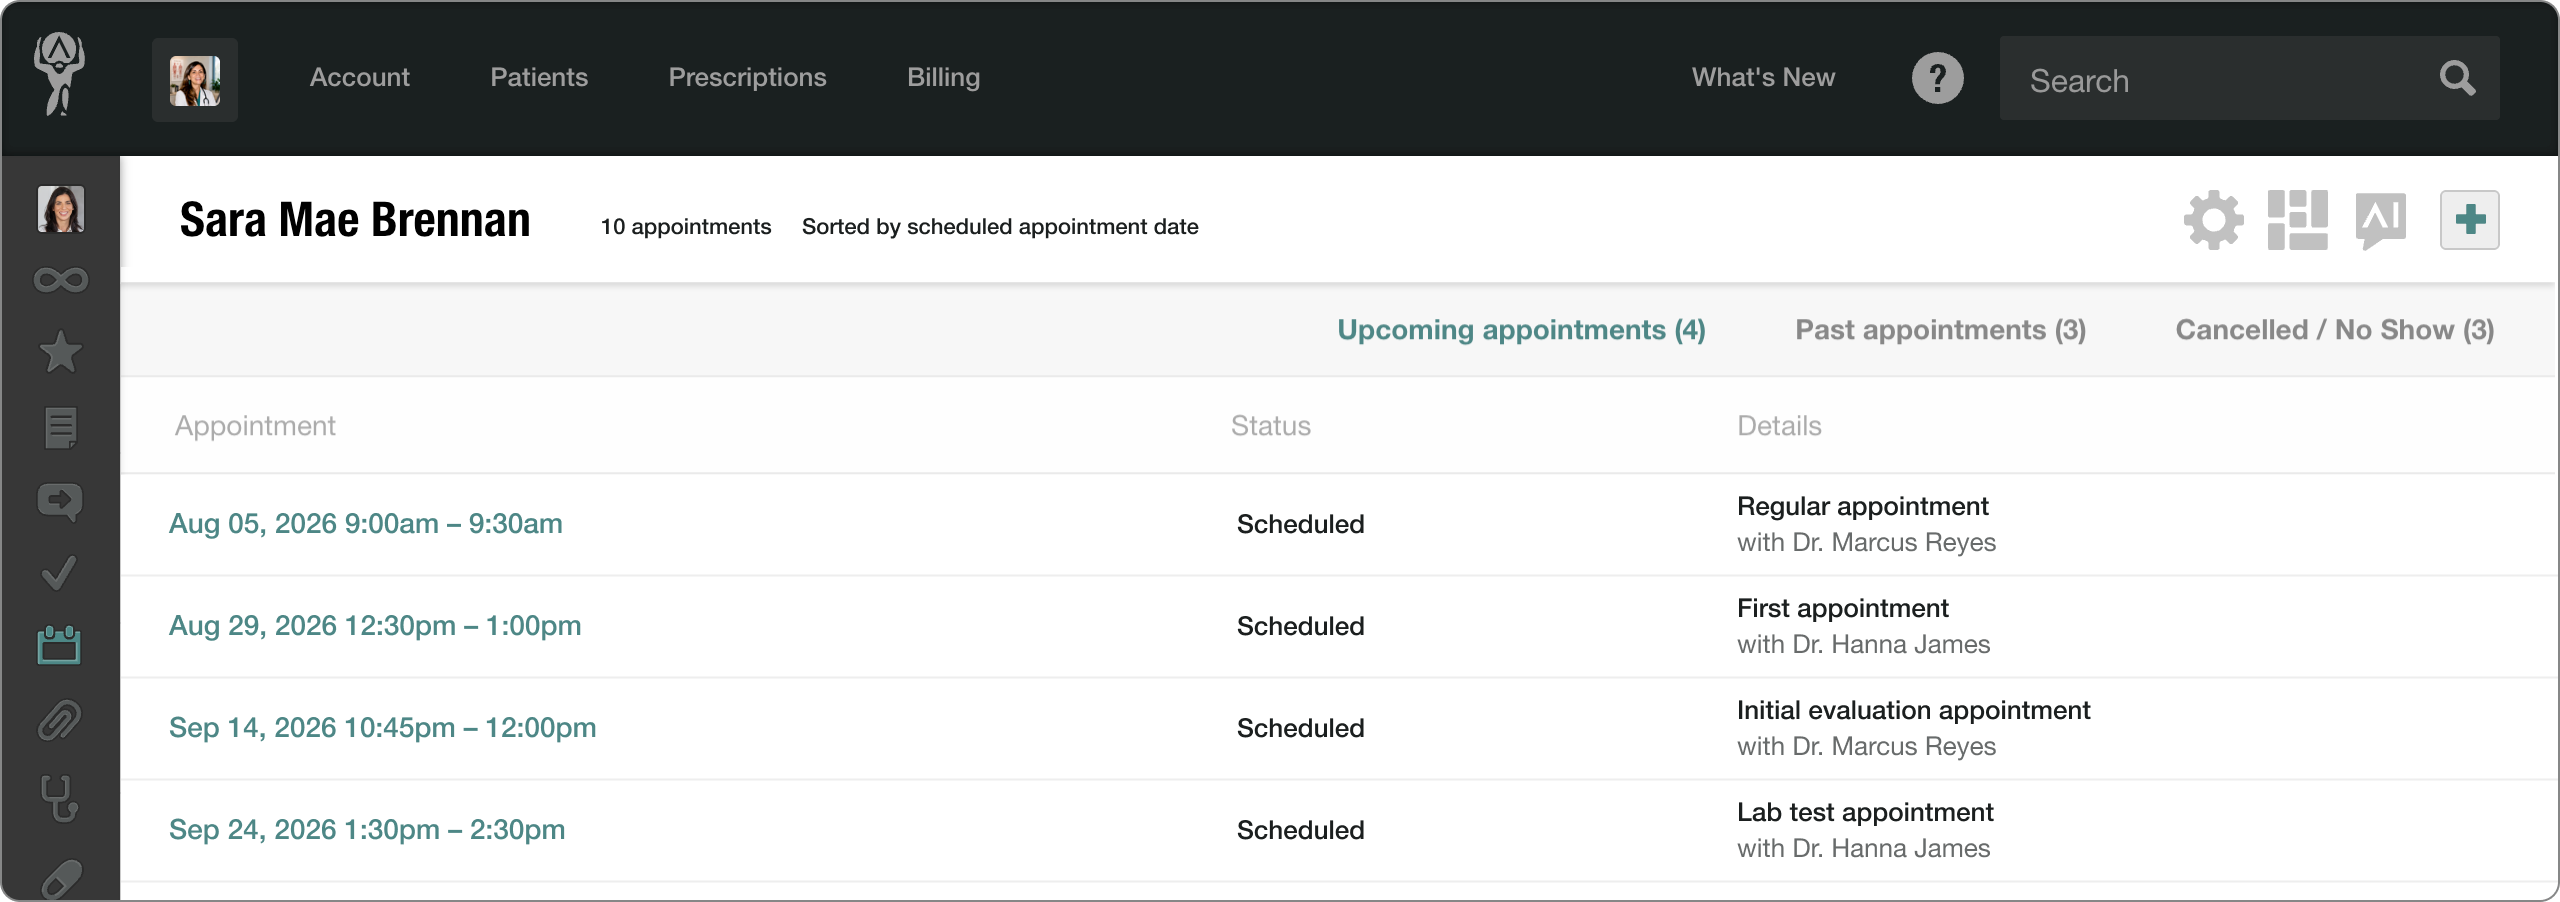
You can move between three separate views:
- Upcoming appointments shows what the patient has scheduled next.
- Past appointments shows visits that have already taken place.
- Canceled / No Show keeps canceled appointments and no-shows separate from completed visits.
Each row gives you the essentials at a glance, including the appointment date and time, current status, reason, and provider.
You can handle most appointment actions without leaving the overview:
- Click the appointment’s date and time to open its full chart entry.
- Hover over an appointment to edit it, change its status, or delete it.
- Click the plus button to schedule a new appointment.
Once a new appointment is saved, it will appear in the appropriate tab automatically.
