


You can access billing from two points of view – from an individual patient standpoint, or from a company standpoint. From the “Billing” top level navigation tab, select the appropriate option. This article goes into detail about what’s possible from the Patient Billing perspective.
Patient Billing Overview
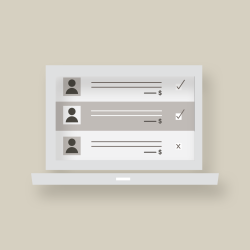
From the main Patient Billing page, you’ll see a list of patients, and their current charges. You have options from here. You can click on a patient to view their individual details, or you can click the settings icon in the upper right corner and select from the resulting list. You can filter patients by overdue balances, who is on the collections list, or you can email or print a batch of invoices, including envelope labels.
Overdue Balances
Clicking the “Overdue Balances” option from the settings drop down shows you which patients have outstanding charges on their account. The full list shows you the patient, the company they’re associated with (if any) and any associated family members on the account. It also shows you how many days overdue the payment is, and by how much.
Patient Detail Pages
Clicking the name of the patient will take you to a detailed description of their billing history. You can view/print recent invoices, analyze existing charges to the account, see any notes on the patient’s chart that involve billing, and any insurance that might be applicable. In the Billing History section, hovering over the description shows you more information about what the incidental was for. If it was a prescription, you can click the prescription to be taken to the full details page of that particular transaction. From there, you can add a payment or credit by selecting the appropriate button in the upper right hand corner.
Adding a Payment
When a patient makes a payment, you can submit it to the chart from the patient’s portfolio page, or from the billing section.
From the Billing section, click the patient’s name. This will take you to the billing overview for that particular patient. At the top right of the page, click “Add payment.” From there, you’ll provide the payment amount, the method of payment (and any additional information Atlas.md consequently prompts you to provide). You can elect to send a payment confirmation email to the client by checking the appropriate box. Next, click “Add Payment” to process the payment.
From the patient’s profile page, click on the dollar sign icon from your sidebar. This will also take you to the billing overview page for the patient, where you can click the “Add payment” button and proceed as described above.
Read more about payments here.
Refunding a Payment
You can refund credit or debit card charges made by patients in the billing section of your patient’s chart. Specifically, in the Billing History section, you’ll see a line with “Payment (and type)” in the description column. You can either hover over that line to reveal a “refund payment” button on the far right, or you can click on that line for a summary of the payment and the option to refund it.
You can refund the full amount all at once, or make multiple, partial refunds that add up to the full refund amount.
Read more about refunds and their timeframe here.
Enabling Auto-Charge
You can automatically bill a patient on a recurring basis by enabling auto-charge. You can do this when you initially create the patient, or you can turn it on from within the billing panel of the patient’s chart. You can also select the date you’d like to charge them each month.
From the patient’s billing page, click the settings icon in the upper right hand corner. Select “Autocharge Settings” from the resulting dropdown. Check the box next to “Enabled” and select a day of the month for the transaction to take place. Finally, click “Save Settings.”
You can also control which auto-charge dates are available for the patient to choose when they enroll online. For example, if you only want your patients to pay on specific days (like the 5th or 10th), you can let them choose between those dates. To set this availability, go to Account in your main navigation. Then select “Settings.” From there, scroll down to “Patient Enrollment Form.” When you click “View and Update Settings” you’ll notice a section for specific days of the month.
Reviewing Auto-Charge Logs
 Want to review all of your automatic charges at once to make sure they all went through? Go to Billing > Patients and Billing. Click on the cog menu, and select Auto Charge Logs. This will give you a list of all of your patients who have automatic billing, and also show confirmation of payment or failure to complete payment.
Adding a Misc. Charge
You may manually add a charge to a patient’s account from the billing section of the patient’s chart.
From the patient’s billing overview page, click the settings icon in the upper right hand corner. Select “Add misc charge” from the resulting dropdown. (Please note that this page is only for miscellaneous charges. Standard charges such as the cost of dispensed medications, lab tests and monthly fees are handled automatically through the system.)
Select the family member the charge is for (if there is only one patient associated with the account this dropdown will not be available.) Enter the charge amount, and what it’s for. Check the box to apply the charge to the current invoice to add the charge to the last day of the previous month. The amount will be applied to the current outstanding balance.
Adding a Recurring Monthly Charge
To add a monthly charge, click the plus sign icon to the right of the Monthly Charges heading on the patient’s billing overview page. Select the family member the charge pertains to, the amount, what the fee is for. You can then elect to check the box which will base the monthly charge on age. Doing so will automatically adjust the amount based on the pricing tiers you set for your patients in your account section.
Adding a Credit
To add a credit to a patient’s account, enter the credit amount and reason from inside the billing panel. Click “Add credit” from the upper right hand side of the billing overview page. Enter the amount the credit is for, the reason for the credit, and check whether or not it’s a write-off. Then click “Save.”
Entering Billing Notes
Billing notes can be added from inside the billing section. On the patient’s billing overview page, scroll down to the Notes section. Click the plus sign icon to add a new note.
Entering Patient Insurance
The patient’s insurance information can also be added from the billing tab. On the patient’s billing overview page, scroll down to the Insurance section. Any information already entered will be displayed there. To add or edit existing information, click the plus sign icon. Information you’ll need to enter include the Insurance company’s name, the patient’s policy number, and the patient’s group number. Click “Add Insurance” to save the information.
Interacting with Patient Invoices
Read this article on the many ways you can interact with patient invoices.
Adding a Patient to Collections
You can add a patient to the collections list from their billing overview page. Click the settings icon in the upper right hand corner, and select “Add to collections.”
The resulting confirmation box will remind you that adding the selected patient to Collections will archive them and make them inactive within the system. If the patient is the head of the family, all the family members underneath him or her will consequently archived as well.
You’ll also be provided a link to the full list of patients marked for collections, where you can make adjustments if necessary.
To view and export a list of all the patients you’ve sent to collections, click “Billing” from the main navigation. Then select, “Patients.” From there, choose the “export to .CSV” option from the cog wheel in the upper right corner. The list will include the Head of Household (HoH) for the account that’s been sent to collections as well as any family members, along with when the account was sent to collections. The exported .CSV file will also include the primary doctor for the patient, branch location they belong to if applicable, as outstanding balance.
If Your Patient’s Credit Card is About to Expire
So when we detect a patient’s credit card is about to expire, or there might be a problem with the payment method for the upcoming billing cycle, we’ll send the patient a gentle nudge to take a look. We’ll ask them to make sure their information is up to date, and even include a link where they can update their credit card directly.
About Credit Card Transactions
Online Card Transaction: Can be either credit or PIN-less debit cards. These transactions are authorized and processed live through our payment processor. Available only to accounts with Payment Services enabled.
Manual Card Transaction: Aren’t processed online and should be used only for record keeping inside the app. These transactions should be cleared first through a point-of-sale device or some other online payment gateway.
Atlas.md also supports multiple credit cards. Alternatively, the patient can manage their billing information themselves and update it as often as they’d like if they’re juggling payments between multiple cards. Just have them download the patient access app to get started.
Other Payment Options
ACH is a payment alternative that allows you to accept payments directly from your patients’ bank accounts. To sync with ACH, go to the patient billing page and click on “add new bank account.” Then enter your patient’s name, routing number, and account number. Check out our help article about ACH here.