


Self-scheduling allows you to invite patients to schedule their own appointments ahead of time. Once invited, patients can select the time slot that works best for them, and the appointment will be confirmed in your calendar.
Patients who manage care for family members—such as children, spouses, or aging parents—can use self-scheduling links to book appointments on their behalf.
Self-scheduled appointments work in tandem with regular bookings and are automatically checked to ensure that they don’t clash with any other existing appointments.
This feature isn’t limited only to doctors; any user, including administrative staff and nurses, can enable self-scheduling.
Managing Self-Scheduling Dates and Time Slots
To set and manage self-scheduling dates and time slots, navigate to your calendar, click on the gear icon in the upper right corner, then select “Patient Self-Schedule Settings.”
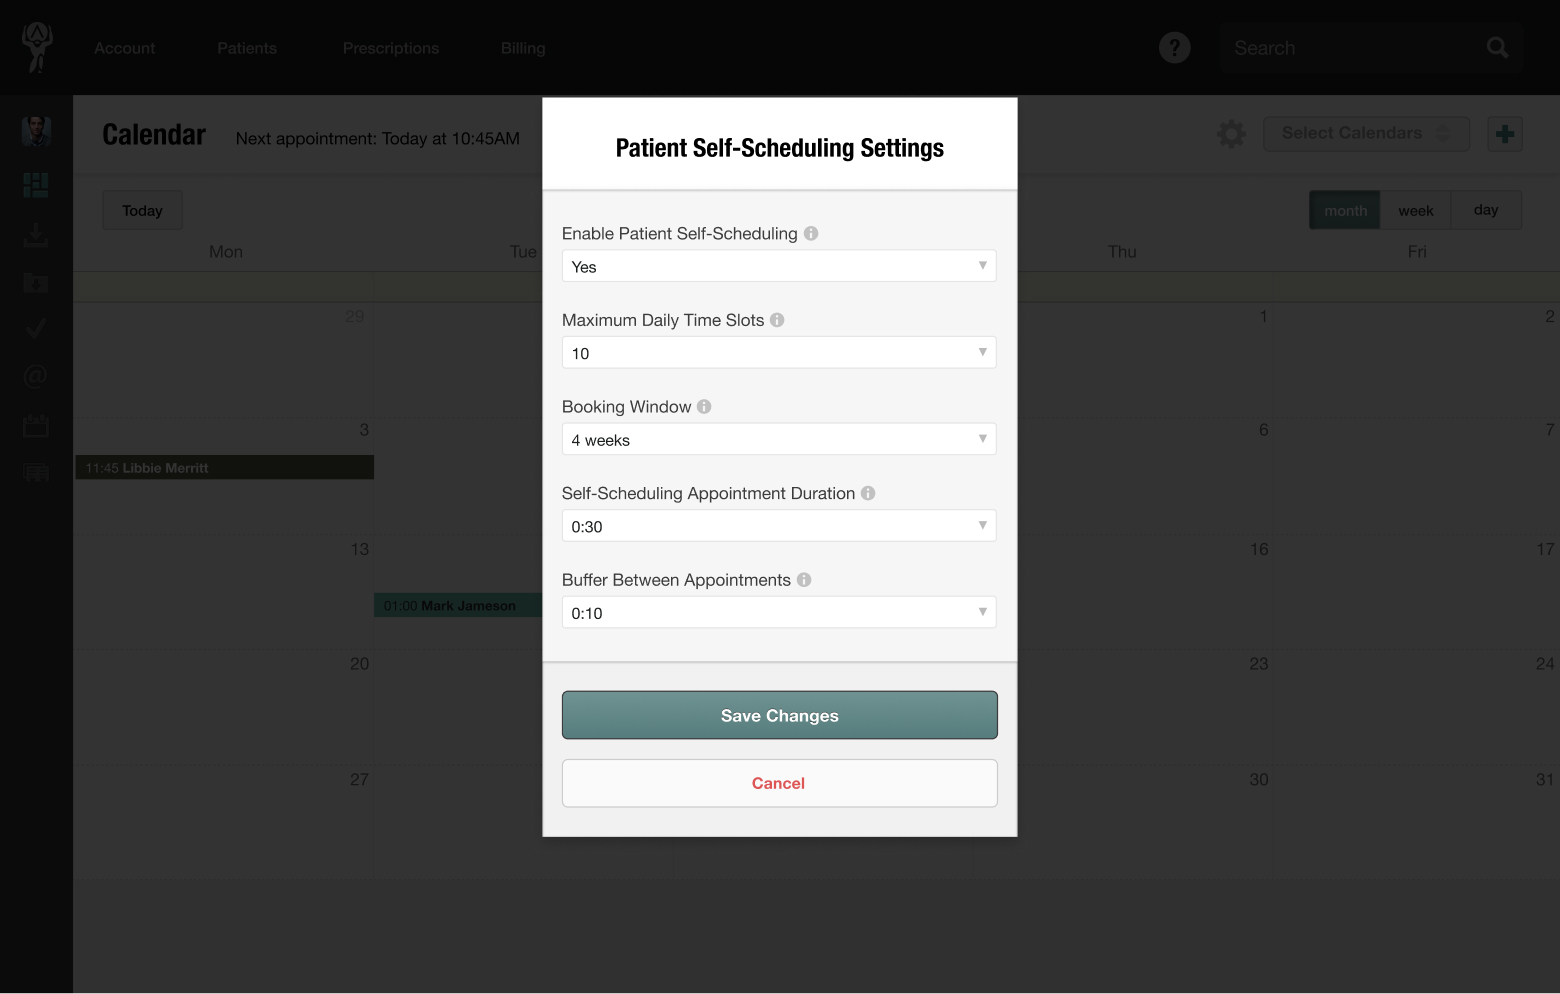
Here you can manage the following options:
- Enable or disable self-scheduling: Turn the feature on or off. If disabled, patients won’t be able to self-schedule appointments.
- Limit visible time slots: Choose the maximum number of daily time slots patients can see (1–15, or unlimited). Selecting “unlimited” shows all available time slots for the week.
- Set scheduling range: Decide how far into the future patients can book, up to thirteen months in advance.
- Adjust appointment duration: Set appointment lengths from 5 minutes to 2 hours.
- Add buffer times between appointments: Automatically block a set amount of time before and after each appointment to prevent back-to-back bookings. The buffer time won’t appear to patients, but ensures your schedule includes built-in breathing room.
- Enable Patient Reschedule/Cancel Appointments: Allow patients to reschedule or cancel their own appointments from the Patient Hub and Atlas.md Mobile. Choose how far in advance patients are allowed to make changes; appointments inside that window will require contacting the clinic.
Once you’re happy with your selection, click “Save Changes” and the settings will apply to all future self-scheduling appointments.
Inviting Patients to Self-Schedule an Appointment
To invite a patient to self-schedule an appointment:
- Head to the patient’s chart, click the gear icon in the upper right corner, then select Invite to Self-Schedule
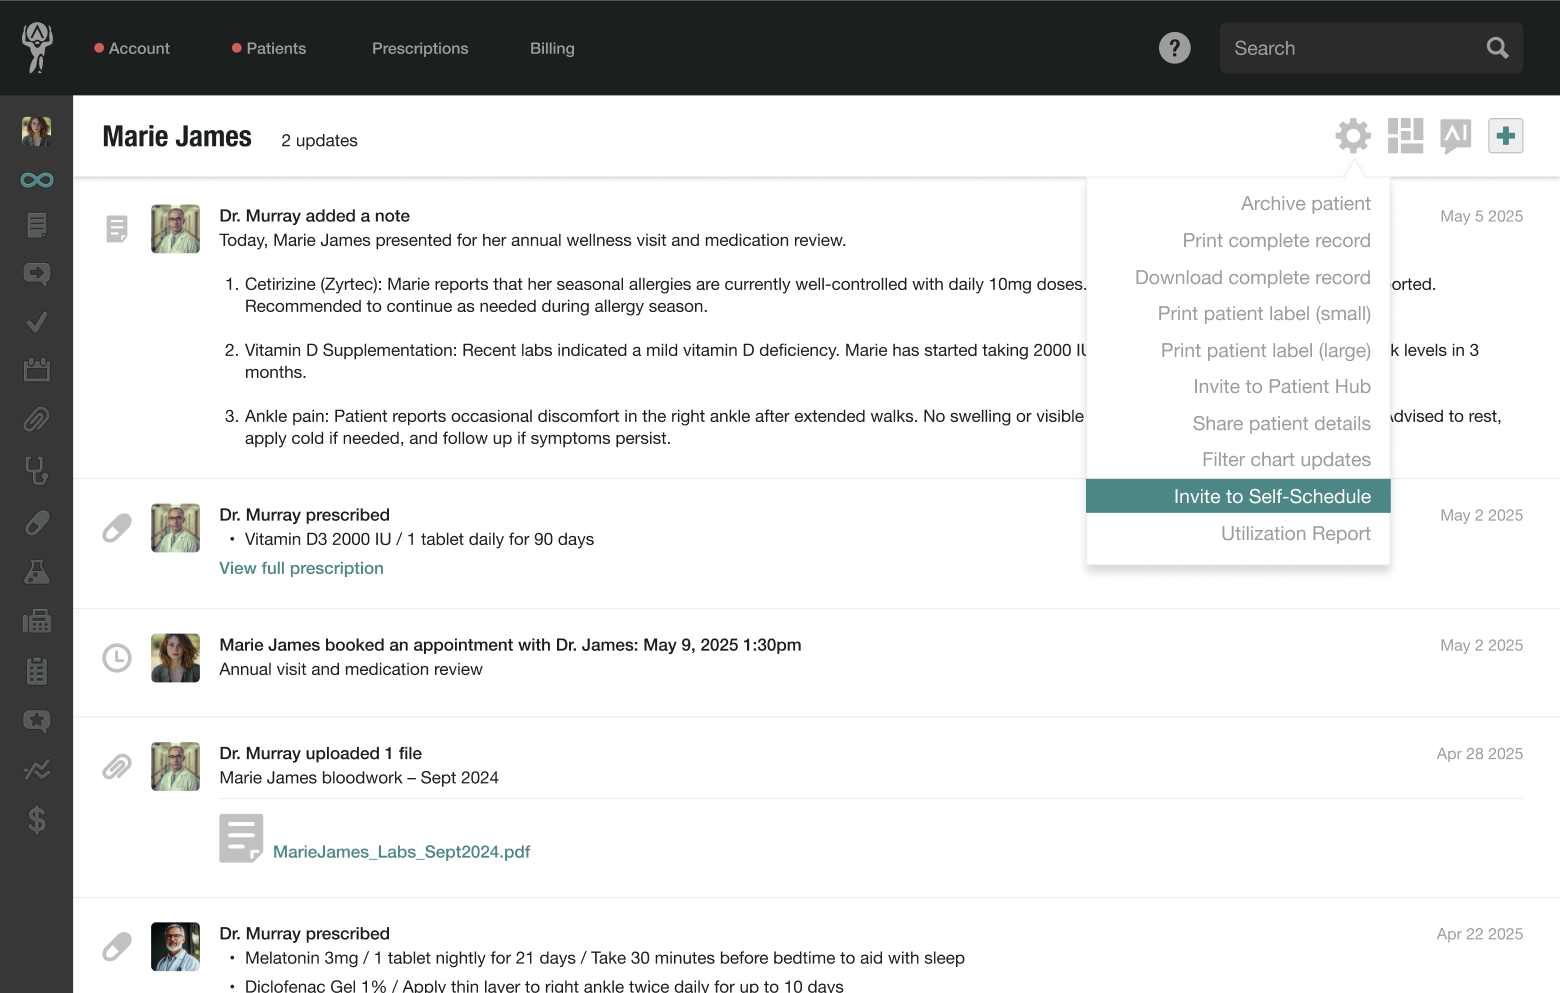
- Choose the doctor responsible for the appointment and the email address you’d like to send the invitation to
- Optionally, write a short accompanying note
- Finally, check the box next to the preferred delivery method–either by email or SMS
The patient will receive a message with a link to their available appointment options for the coming days or weeks, based on your self-scheduling settings.
Once the patient selects a time slot, you’ll receive a confirmation email, and the appointment will automatically appear in both your calendar and the patient’s chart.
How Atlas.md Records Family-Scheduled Appointments
When a patient schedules an appointment for a family member, Atlas.md keeps a clear record of who created the appointment.
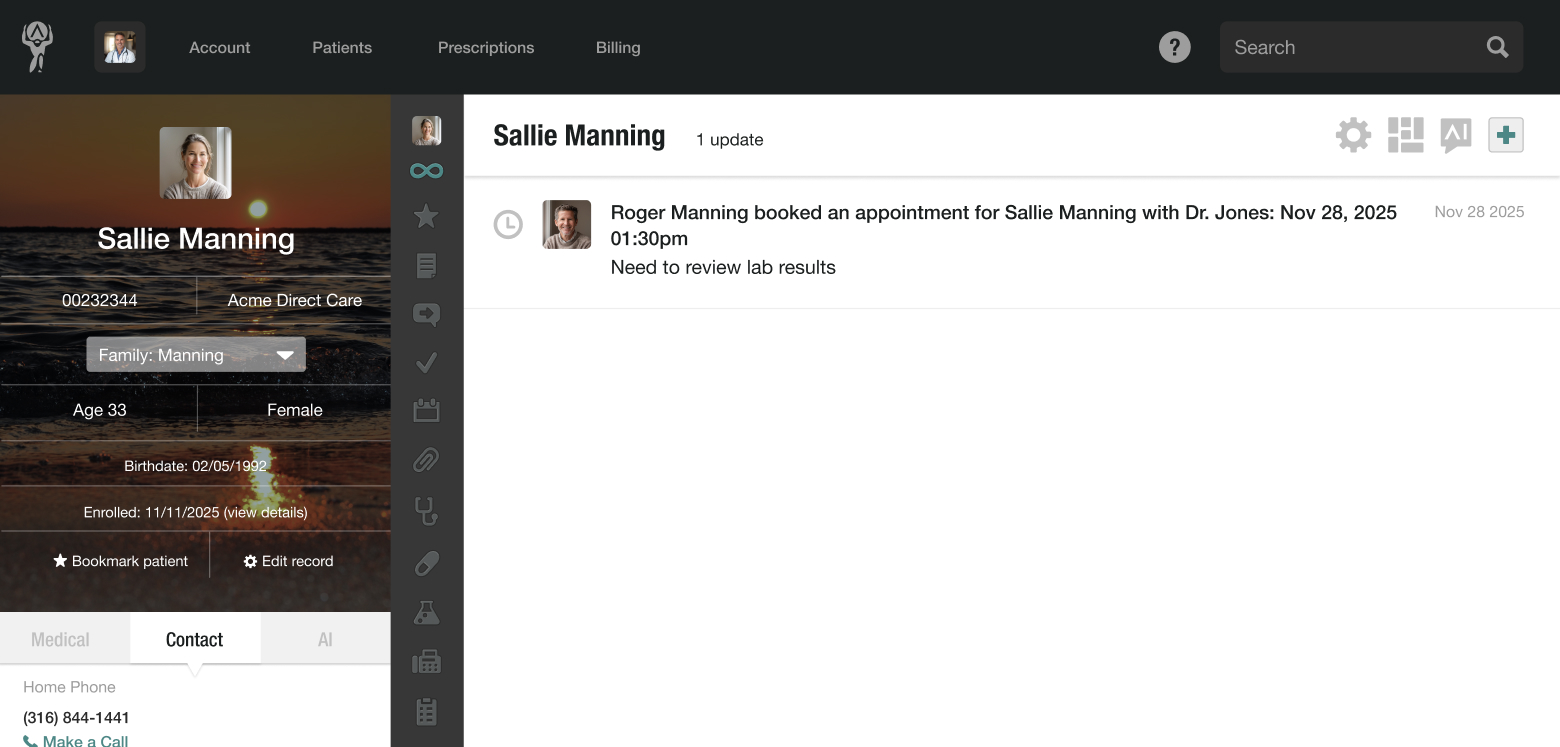
In the appointment details, you’ll see:
- The patient who will be seen, and
- The family member who scheduled the visit
This information appears anywhere you view the appointment, including the calendar and the patient’s chart. For example, if a parent schedules an appointment for their child, the child’s chart will show the appointment, and the appointment details will note that the parent scheduled it.
This helps ensure you always know who to contact for clarification before the visit.