


Shared appointment resources allow your clinic to schedule and manage items used by multiple staff members, such as:
- Examination rooms
- Diagnostic equipment
- Microscopes
- Any other shared clinic resource
By adding these resources to Atlas.md, staff can see their availability directly in the scheduling window and avoid double booking.
Adding a Shared Resource
Before a resource can be scheduled, it must first be added to your clinic’s shared resources list.
To add a resource:
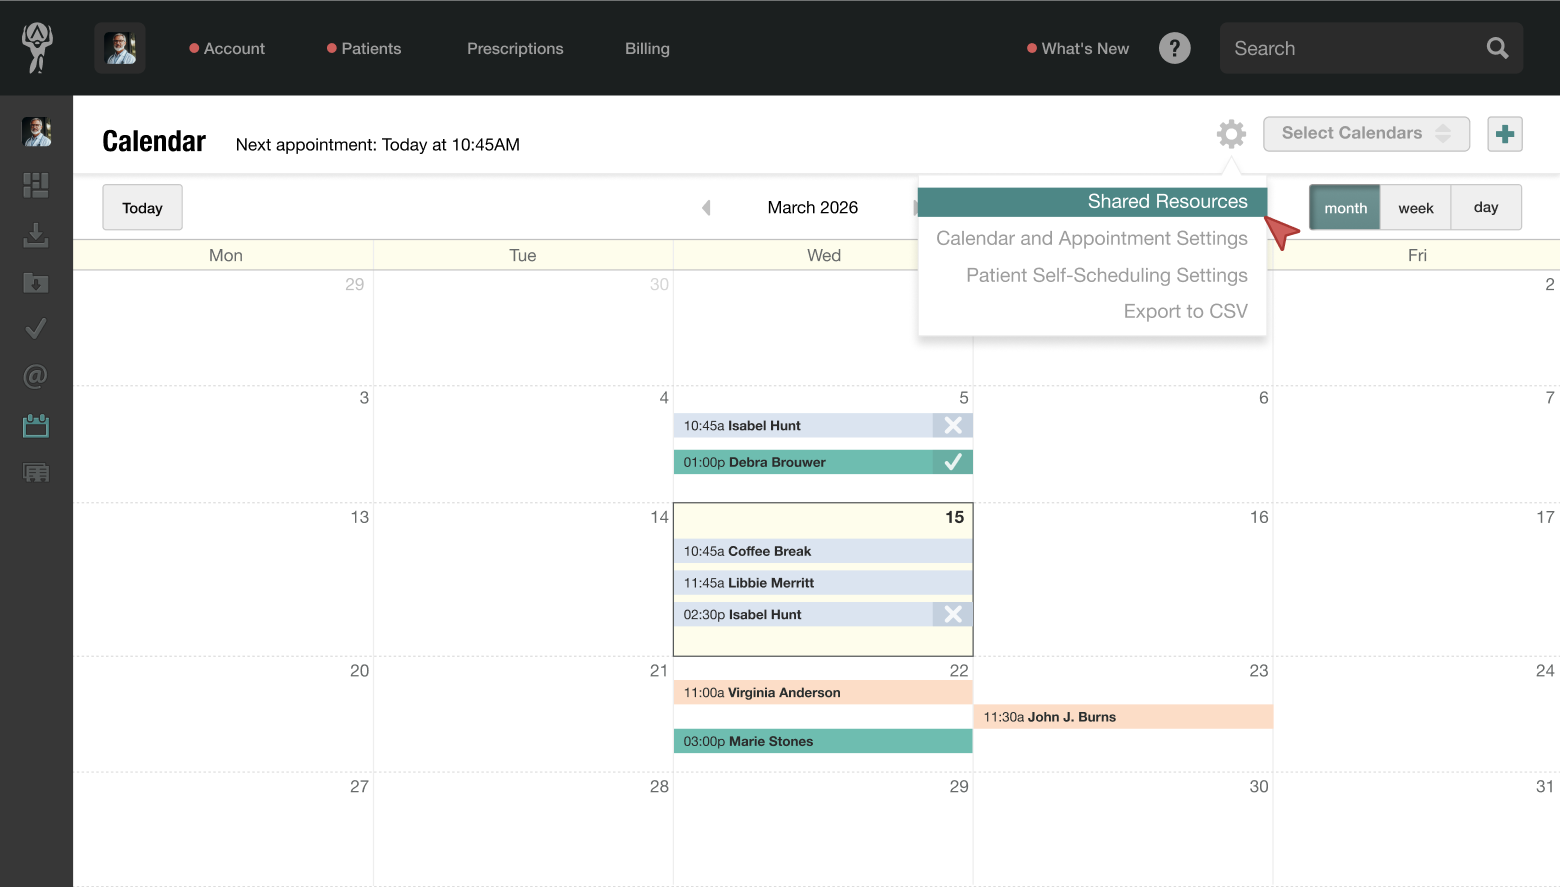
- Open the Calendar from the side navigation
- Click the gear icon in the upper-right corner
- Select Shared Resources from the dropdown menu
- Enter the name of the resource you want to add
- Click Save
Once saved, the resource will be available to all staff members for scheduling appointments.
Booking a Resource for an Appointment
When creating an appointment, you can assign a shared resource if one is needed.
To book a resource:
- Create or edit an appointment
- Locate the Resource dropdown in the appointment window
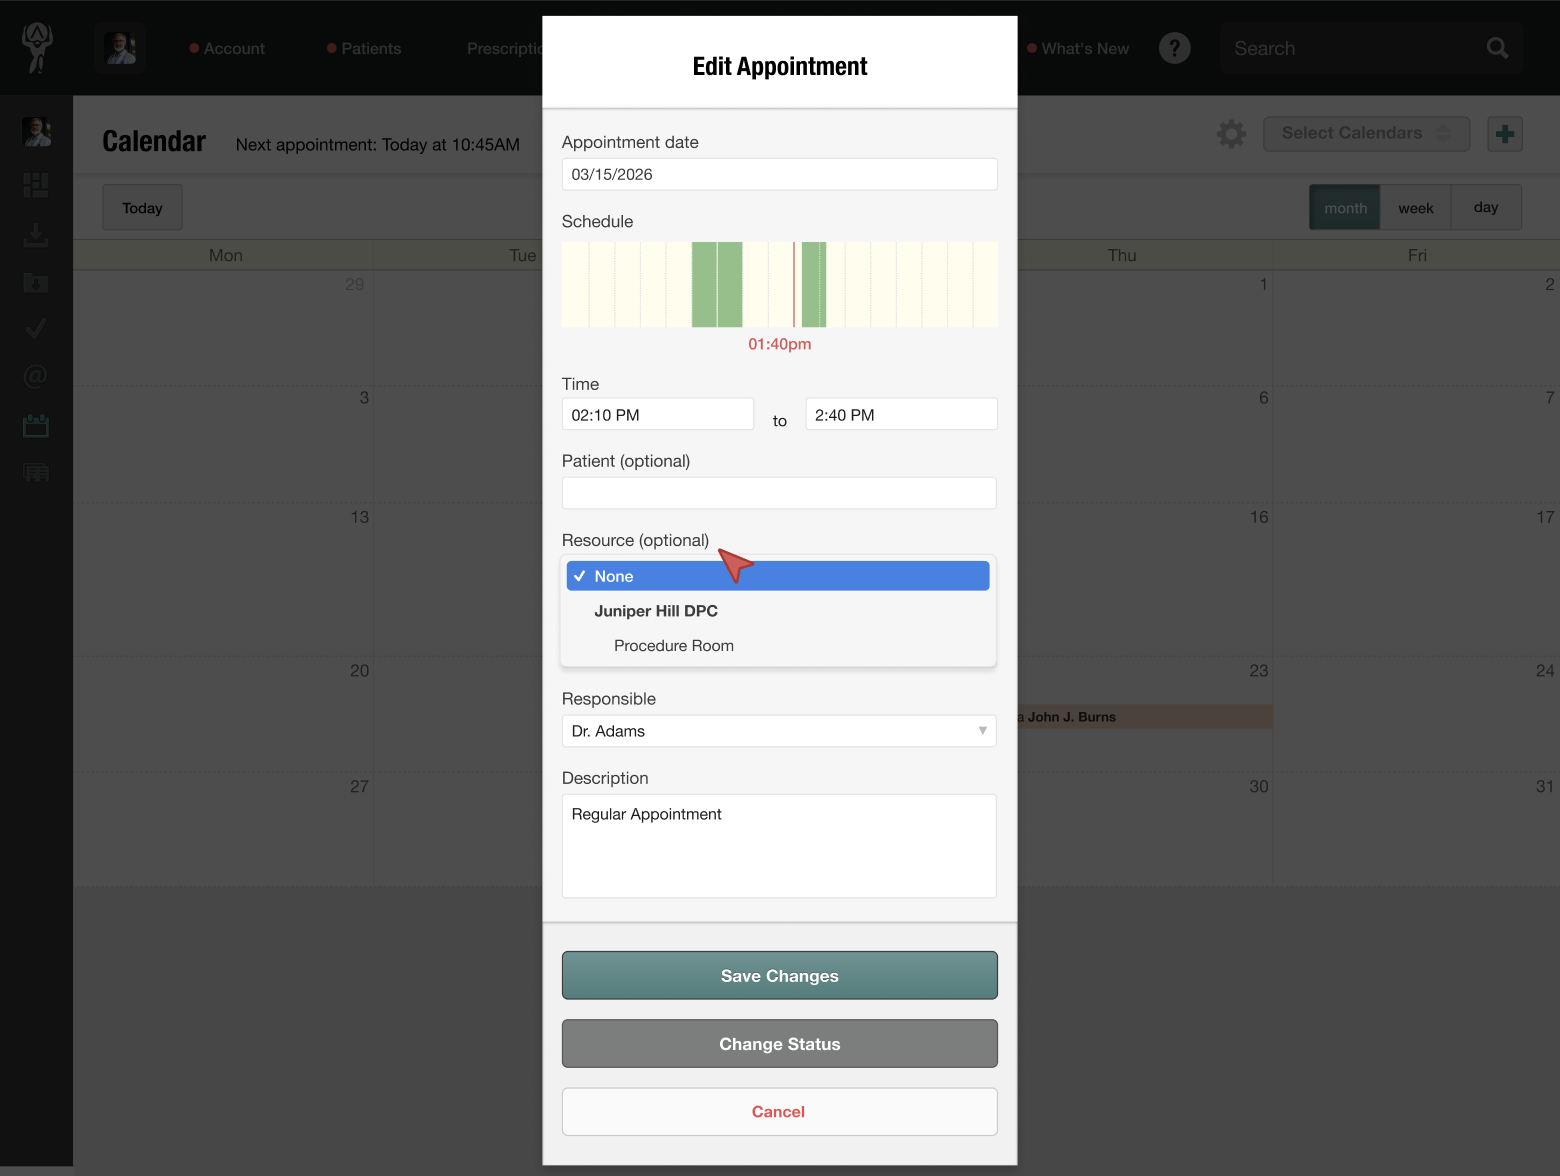
- Select the resource you want to reserve
- Save the changes
If no resources appear in the dropdown, shared resources have not yet been added.
What Happens if a Resource Is Already Booked?
If a resource is already scheduled during the selected time slot, Atlas.md will display a notification showing who currently has the resource reserved.
You will not be able to book the resource for that time until it becomes available.